Monday, April 27, 2015

Gold Leaf Clipboard


My theme verse for this year is Romans 12:12: 

Be joyful in hope, patient in affliction, faithful in prayer.

While searching for well-designed art with encouraging Bible verses for a project for a friend, I came across this on Pinterest:


Which is a lot better-looking than my current display:


So I printed it and decided to add it to the gallery wall in my office...that I'm planning in my mind.

For this project you'll need:
a clipboard
a gold leafing pen (mine was 18kt. gold by Krylon)
a print

I decided to use a clipboard (with the idea that I'll find a cute printable every year in the future and can change it out easily).  Of course, I wanted to dress it up, so I decided to gold leaf the clip.  I found using a gold leaf paint pen worked great.  Since the clipboard came shrink-wrapped, with the clip left out, it was perfect - no need to tape around it before painting. 


I love how it turned out!


Monday, April 20, 2015

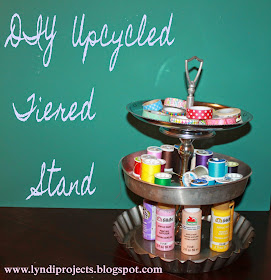
DIY Upcycled Tiered Stand

tin tiered stand, upcycled pie tins

Ever since I saw this Tiered Tin Stand I wanted to make it.  I found plenty of tins to use at Goodwill.  But I could NOT figure out what to use for the in-between.  I tried various wooden pieces and candleholders until I finally decided on plain 4 inch silver holders.


I tried both hot glue and super glue and found they worked about the same.  Then I just tried to get the holders in the center of each tin.


Then I had fun filling it with colorful craft supplies, which freed up some of my enclosed craft storage boxes!


Monday, April 13, 2015

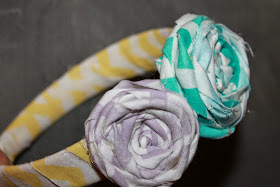
Shabby Chic Fabric Rosette Toddler Headband

I wanted to make a headband to match THIS DRESS so I used the leftover fabric and a headband from the dollar store to make one.

chevron fabric rosettes, DIY hair accessory

For this project you'll need:
headband
fabric strips - approximately 1 inch wide; choose the length based on how large you want your flower
hot glue gun

Step 1: I wrapped a strip of the yellow fabric around the headband, securing it at the ends with hot glue.


Step 2:  Fold your 1 inch strip in half, lengthwise, wrong sides together.  (I think the purpose is to make sure more of the design is seen.)  To make a rosette, tie a knot at the end of the strip of fabric.


Step 3: Twist fabric into a rope, then wind it around the knot, securing with hot glue as you go.


Monday, April 6, 2015

Pastel Chevron Tiered Ruffled Toddler Dress


I went to the fabric store to help my mom pick out fabric - I found pastel chevron and could just picture my niece in it! 

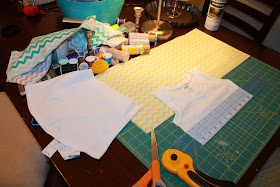
For some reason I eschew using a pattern.  I kind of laid out what I had in mind.


I figured I'd make a variation of the tank top bubble dress I have made her before.  I bought a white tank and decided to cut it, about 3 inches below the arm holes.


I had bought half a yard of each color of fabric and knew I wanted tiers. Rather than make a bubble dress,  I hemmed the bottom of each tier.  I cut the longest layer about 16 in. and then made each layer 3 inches shorter than the one below it.


After hemming the bottom, I folded each tier in half, right sides together and sewed the short end, making a circle.

Then I pinned the top of the three tiers together.  Then I sewed a wide stitch a the top and pulled on the bobbin thread to make ruffles and size the skirt.  Then I sewed the skirt to the tank, right sides together.


My niece Hadley looks CRAZY adorable in it!!

Check out next week's post to see the adorable matching headband!!