I wanted to find a craft for my Bible Study girls to make at our Christmas party. My requirements:
1. easy
2. not too time consuming
3. inexpensive
4. something cool they would actually use
I don't ask for much!
I think I found the perfect thing - a yarn-wrapped star ornament (don't think "kindergarten project", think "Pottery Barn, rustic chic").
I think I found the perfect thing - a yarn-wrapped star ornament (don't think "kindergarten project", think "Pottery Barn, rustic chic").
For this Project, you'll need:
printed star shape (or hand-drawn, if you can)
scissors
cardboard (mine was literally a Crate & Barrel box from a recent order)
hot glue gun/glue sticks
twine
Decide on the size and shape of star you want and print it. You can find a customizable shape Microsoft Word under Insert<Shapes.
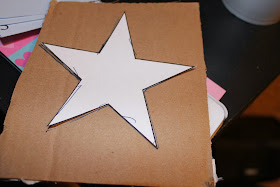
Then cut it out and place it on top of your cardboard and trace around it.
Cut the star out of the cardboard.
Hot glue a length of twine to the star, to be the ornament hanger.
Hot glue the starting end of the yarn - then start wrapping - there is no right way to wrap, as long as you cover all the cardboard, you will be successful! I found it helpful to hot glue the yarn at each of the star points. When you've finished wrapping, cut the yarn and hot glue the end to the back of the ornament, tucked under.
The stars can be used as ornaments or as a decorative element on gifts.
Look how great it looks on my tree (bottom right)!


No comments:
Post a Comment