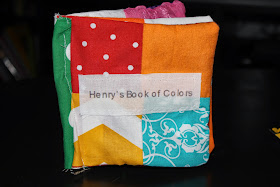
I saw a DIY color book for babies online and was inspired to make one for my nephew.
Since my nephew Henry is 3 months old and is at the earliest stages of discovering colors and textures. I wanted to make him a personalized, soft book.
I had fun going to the fabric store and choosing a variety of fabrics and I knew I had probably 3/4 of the needed fabrics at home in my scrap fabric box.
For this project you'll need:
iron-on transfer paper
computer/printer
3 different 3.5x3.5 squares of fabric in the following colors (30 total):
-red
-orange
-yellow
-green
-blue
-purple
-pink
-brown
-black
-white
10 3.5x3.5 squares of fabric in white
8 other 3.5x3.5 squares of fabric (different colors) for the cover and back
rotary mat/cutter (optional)
sewing machine
I used this tutorial from stitch/craft to make this project.
Step 1: Print the colors listed above on iron on transfer paper, being sure they will fit onto a 3 in. square, as well as any title or back cover words you want, . Also they have to be printed as a mirror image.
From this point on, iron after each step.
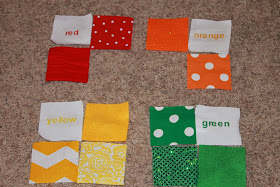
Step 2: Cut your squares and lay out your design.
Step 3: Iron on the words to the white squares.
Step 4: Sew two squares of each page together (bottom two and top two).
Step 5: Sew the top and bottom of each page together.
Step 6: Sew the title onto the cover page.
Before the next step, I evened up my squares - if you are a good seamstress, this probably isn't necessary!
Step 7: Sew the pages together by placing right sides together and sewing 3 sides together (not the left/binding side.) The pages to sew together are as follows:
front cover/red, orange/yellow, green/blue, purple/pink, brown/black, white/back
Step 8: Turn pages inside out so right sides are facing out.
Before binding, I decided to add crinkly plastic (I cut up my takeout bag from McAlister's!) to the inside of the pages. I know Henry will enjoy that - hopefully it does ok in the washing machine!
Step 9: Cut a strip of fabric to serve as the binding. Press the top and bottom edge under. Place right sides together of the book cover and the binding and sew raw edges. Note: This step was CRAZY hard. The tutorial I followed made it look like an easy last step - it isn't! my stack of fabric was about 3 inches thick and it was almost un-sewable, if that were a word.


No comments:
Post a Comment