Monday, August 27, 2018

Quiet Book - Carrots in the Garden


For this Project you'll need:
light blue felt
white felt
green felt
orange felt
red felt
gray felt
dark brown felt
light brown felt
scissors
thread
sewing machine (optional)
a button

This was one of the simplest pages to make because I didn't need to cut out any patterns from paper or make intricate details, I was able to freehand cut everything.  This pic shows everything cut out and laid out.


After I cut everything out, I used my sewing machine to sew first the clouds, then the light brown, leaving a few spaces for carrots to go (just backstitch on both sides of the opening), then the dark brown felt, sewing the sides, but leaving a large opening in the middle for carrots, then the green felt, leaving the whole top open as a pocket.  Then I sewed the red wheelbarrow and then the three gray strips of felt were the final, you'll see I decided to use a zig zag stitch on these.


Then I hand-sewed the button on as the "wheel" of the wheelbarrow.  The last step was to hand sew the carrots together.  I cut out two pieces of orange felt for each carrot, so I sewed around the edge of these, making sure the green leafy part was in between at the top.  As you see below, I tried different stitch lengths and techniques - I think that adds to the handmade charm!

I love thinking through all the things a child can learn from this page.  What carrots look like, what a wheelbarrow looks like, where carrots come from, how carrots are harvested, that carrots grow in the dirt, but the green top is above the dirt.

And I love the element of fun to pull the carrots out of the ground...


...and load them into the wheelbarrow!


Monday, August 20, 2018

Quiet Book - Counting Page

Lyndi's Projects, #lyndiprojects

I made a felt quiet book for my niece Hadley a few years ago - it was so much work, but so fun to see it come together.  Click HERE to see her finished book.  Last time she visited, she brought her book with her and my 4 year old nephew saw it and looked through each page and said, "I love this book!" So it got me excited to make one for him!  A lot of the pages I'm planning for Henry's book will be new and different - unique to his interests, but the counting page is one that I did in Hadley's book and loved it and thought it would be great for Henry's as well.

For this project you'll need:
2 colors of felt
Felt number stickers - like these:

different buttons for each number
needle and thread
sewing machine
scissors
rotary cutter and mat (optional)

The most fun part is picking out fun buttons.  Obviously, when picking them out, remember the smaller numbers can be larger buttons and the larger numbers need to be smaller buttons, so they'll fit under the flaps.  Mine are from Hobby Lobby, Michaels and Walmart.

Real life pic - working on different pages!

After the planning phase, I cut my background felt into a 9x9 inch square, because that's the size I chose for my quiet book pages.  Then I used my rotary cutter and mat to cut the orange sparkly felt to a little under 3x3 inch squares.  Then I stuck the felt sticker numbers onto the squares.

Then I used my sewing machine to sew each square to the background felt, with a zigzag stitch.

Then, while watching Netflix (binge-watching New Girl) I sewed the buttons under the flaps.  Here is One Heart.


Two Monkeys

Three Stars

Four Cats

Five Soccer Balls


Six Owls

Seven Sea Turtles
These are actually beads I found in the jewelry making section of Michael's, so that's something to keep in mind - they had some really cute bead options.

Eight Flags

Nine will be Bees.
(Beads? Bees.) #ArrestedDevelopmentReference
I found these at Walmart and they had some really cute buttons there - some Disney and animals, so keep them in mind as well.


I love how it turned out - I think it's so fun to lift the flap and see what's there!

Stay tuned for more Quiet Book Pages - that's my main craft focus right now!


Monday, August 6, 2018

DIY Pirate's Treasure Map


I LOVE how my nephew Henry, who is 4, gets really into topics.  He's been into trains, dirt movers, colossal squids, octopuses, the human body and now pirates.  When he discovers these new interests, his mom takes him to the library and they check out all the books on that topic.  He listens intently and learns all the facts.  It is super cute.  So when my sister told me the new topic was pirates - my mind started turning.  I thought he'd love finding a treasure map and hunting for buried treasure!

I was searching through Dollar Tree  - looking for treasure and getting ready to buy giant checkers and spray paint them gold - when I found the perfect package of oversize coins in the party favor section!  In the same aisle I found a little gift box that was perfect.  And then I bought a 2 pack of gold bead necklaces (and pulled off the shot glasses).

Then I went to the park and surveyed it - I figured out a perfect place to hide the treasure and drew myself a rough map of the park.  Wichita has the perfect park for this activity - the play equipment is a pirate ship.


For this project you'll need:
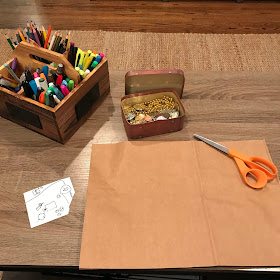
brown paper bag
markers
"treasure"
"treasure chest"


I cut an oval out of the bag and then crumpled it and tore the edges - to add character and make it look old.  Then I used colored pencils, markers and metallic pens to prepare my map.


I got to the park ahead of Henry's family and hid the treasure and rolled up the map and told him I found it in Pirate's Park and I needed his help to find the buried treasure.  He was SUPER excited!


I helped him spot landmarks on the map and he ran to each new landmark - each one taking us closer to the treasure.

Once we found the treasure - he was still so happy and excited - he carried it all around the playground. 


His baby sister was very interested in the treasure too!  I love that for under $5 and a little effort - Henry and I created this fun memory together.  It's one of my favorite jobs, as an Aunt, to create magic for my nieces and nephews.