Search This Blog

Monday, April 28, 2014

Pillowcase Dress

 
During one of my regular trips to Goodwill, I saw an old, ivory pillowcase for $1.99.  I bought it with the hope that I could re-purpose and up-cycle it into a dress for my niece Hadley. 


I got it home, washed it and started researching tutorials.  I needed double bias tape in ivory and some brown ribbon, so I stopped by Hobby Lobby for those.

Then, after Saturday Night Live, at midnight, inspiration hit and I decided to start the project.  Right now morning-people are shocked and night-people know EXACTLY what I'm talking about.  :) 

I cut several inches off the top, to make it the right length. 


Then I used a 4T tank top that I had bought for Hadley as a guide for the arm holes.  I folded the pillow case in half vertically, so I only had to draw/cut once.  You draw a J shape that is about 4.5in. long and 2.5in. wide.


Then I pinned and sewed the double bias tape on the edges of the arm holes.  Then I went to bed. 

The next day I made a casing in the top edges.  I ironed approx. 1/4 in. down, then pinned and ironed 1in. down.


At that point I realized that even though I had washed it, it still had a musty, thrift store smell.  NOT ok for a gift for Hadley.  So I researched and tried soaking in in hot water and white vinegar, then letting it air dry outside.  Still musty.  Then I soaked it in the washing machine with hot water and Oxyclean for several hours.  Then finished washing it with Tide.  Fresh and clean!

Then I put a safety pin on the ribbon and scrunched it through both sides of the casing, because I like the look of one bow.  (You can use two lengths of ribbon and tie them together on both shoulders.)  I used a flame to seal the ends of the ribbon (you just get them near the fire, not in it.)

All finished!


I LOVE that on Saturday this was an old, musty pillowcase sitting in Goodwill and on Sunday, it was a beautiful, clean, new dress. 

And Hadley, in her pink cowboy boots and new pillowcase dress, could not be any more adorable!!

Monday, April 21, 2014

Adorable Kleenex Box Monster

My sister Jordan pinned a picture of this project on the same day I ran out of Kleenex - kismet!  Plus, her birthday is coming up and I knew my gift would fit perfectly.  And I had all the materials to make it in my craft supplies. 

 I figured, who wouldn't want to stick their hand in a monster's mouth to find a gift?!


 For this project you'll need:
empty Kleenex box
white paper cut into teeth
2 coordinating colors of paint
paint brush
empty egg crates or Styrofoam balls
hot glue gun
marker or googly eyes
 
1. Paint the empty Kleenex box, after taking the plastic stuff out of the top.  I used spray paint and it only took one coat.


2. Then use a paint brush and acrylic paint to add dots.


3.  Cut the teeth out of white paper.


4.  Hot glue the googly eyes onto the Styrofoam balls.


5.  Hot glue the Styrofoam balls onto the top of the box and hot glue the teeth into the box.


Easy to make monster!  What to do with them?  Halloween decorations.  Kids party decorations.  Favor boxes.  Craft project for kids.

What would you do with these adorable monsters?

Monday, April 14, 2014

Make Your Own Easter Basket!

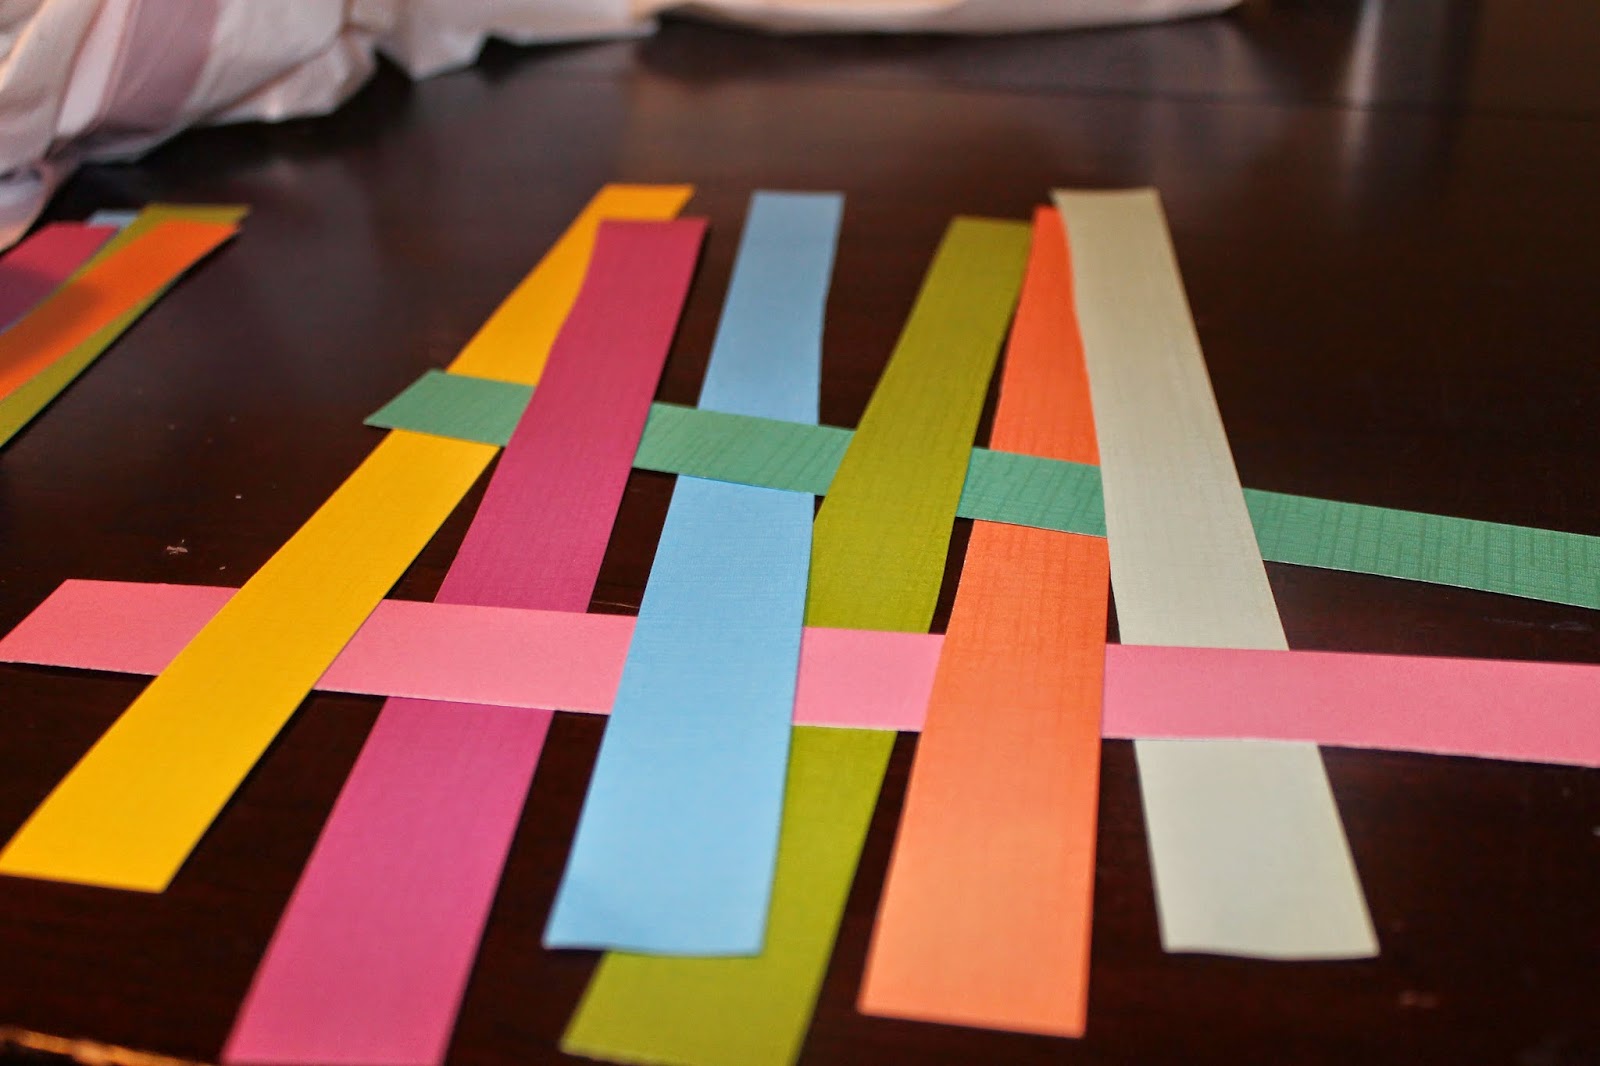
This project is an easy-to-make woven paper basket that can be used for Easter, May Day or any other special occasion!  This was actually really fun to make and kind of amazing you start with strips of paper and end up with a basket! 
 
For this project you'll need:
 
approx. 15 colorful strips of paper 1x12 inches
tape
double stick tape
 
 
Stetp 1:  Lay out four strips of paper
 
Step 2:  Weave four strips of paper through the first four, going over then under.  The woven part should form a square in the center.


Step 3:  Fold up the sides.
 
Step 4:  Begin weaving strips through the sides, using double stick tape, occasionally.  There should be 3 rows high of paper woven through the sides.
 
Step 5:  Fold the remaining paper down, on the inside and tape down with regular tape. 

 
Step 6:  Use one strip to make a handle and tape down to the inside.
 
Step 7:  Fill with Easter grass and Easter candy!! I made my own Easter grass with curling ribbon.


Monday, April 7, 2014

Jelly Bean Vase

 
This would make a great and easy Easter centerpiece!
 
For this project you need: 
 
2 vases - they should be the same height and same shape, but have 1.5 - 2 inches different diameters
jelly beans
flowers (or grass)
 
Put the smaller vase into the larger and put the jelly beans in the space between them. 
 
 
Then add flowers!


Monday, March 31, 2014

Springy Striped Rag Quilt

I think sewing has become my form of therapy.  This sewing project has brought all these self-revelations to the surface.  I've noticed that I like to attempt sewing projects that are a bit beyond my current set of abilities.  I like to try projects that challenge me and force me to learn something new.  I have also found that I work obsessively to complete projects.  I hate the idea of leisurely stretching the project out - I want to work on this single-mindedly until it's done.  I worked on this quilt all through the weekend, stopping only for sleep and Sonic drinks!


I found this project at Do It Yourself Divas and I thought the baby blanket was adorable and then I saw the striped springy colors and I was obsessed!  I loved the look and wanted to make a bunch in pretty spring colors, just like they did.  Luckily, I decided to just start with one.  It was definitely more time consuming than I expected.

Here are things I loved about this project.  First I got to use my new rotary mat and cutter. 


Since it was my first time using one, there was a learning curve, but it was perfect for cutting out the various strips needed for this project.  I did that Friday night while watching Private Benjamin. 

 
I really like the rag quilt look and had been wanting to try to make one.  Both my niece and my nephew-on-the-way received one as a gift and they're so adorable, I wanted to do a practice one to see if I could make one.


I've been afraid of making binding out of fabric - it seems so confusing.  So up to now I've used bias tape or self-binding fabrics.  The blog above posted a really great YouTube video with instructions on how to make your own binding.  I think I'll get better with practice, but it feels good to have done it. 


Now we get to things I did not love about this project.  I lost three needles during this project.  Two broke and one is lost somewhere inside my machine...  Apparently the layers of flannel is hard on needles.
Cutting the little fringe was a LOT of work.  I did half while watching Argo and talking to my mom and the other half while catching up on Community but it really hurt my hands. 


The washing process opened a whole new set of problems.  Fringe got everywhere - it stuck to my washing machine walls and filled my dryer lint trap and settled on the ground in the laundry room.  Also, several of my rows came apart in the washing machine, so I had to do a lot of re-sewing.  Finally, you know those little fuzz balls that form on sweaters?  They covered the blanket after washing and wouldn't come off until I went over the entire blanket with one of these fabric shavers.


But overall, I had fun doing this and I was really proud of myself for the accomplishment and I love how it turned out!  What springy color combination would you use for a blanket like this?

Monday, March 24, 2014

Creative Toddler Activities

Do you have a toddler in your life?  Your own kids, a niece or nephew, a grandchild, a sibling, kids you babysit or the child of a friend?  If so, you might be looking for some new activities to keep them entertained, challenged, happy and learning!


My niece Hadley came to visit last weekend and although she would be happy to spend all her time playing with toys and her grandparents, I wanted to plan some creative activities for her.  I searched the internet and tried some of the ideas out.


1.  Pipe Cleaners

The idea I found said to put pipe cleaners through a colander, but I just bought a small pack of colorful pipe cleaners and opened them and then set them on the floor.  That drew her in!  Hadley loved picking up bunches and throwing them in the air, like confetti!  I picked one up and made a circle (shape learning) and she loved that and started bringing me more to make into circles.  I tried asking her to bring me certain colors (color learning). 


2.  Play-Doh

I don't think explanation is needed - kids love play doh!  Hadley liked it best when it was rolled into a ball.


 3.  Contact Paper Face

This was my favorite idea.  You tape a big piece of contact paper to the wall, sticky side up.  Then you gather random things from your craft supplies and put them on a tray and then let the toddler stick things to it!  The only thing I bought for this was a pack of googly eyes.  I gathered some strips of paper, pieces of yarn, fabric remnants and buttons.  (I learned jingle bells don't stick.)  Hadley liked sticking the googly eyes on.  I also like that you can do a lot of variations with this idea.  You could give them a tray of colorful cereal and let them stick it on.  You could gather items that are part of a theme - leaves for fall or green items for St. Patrick's Day, you could draw a sheep and let them stick cotton balls on it.


What fun and creative toddler activities have you tried lately?

Signature

Signature

You Might Also Like...

Blog Archive