Search This Blog

Monday, September 30, 2013

I Bought Some Cute Shoes...So Then I Needed To Sew A Skirt To Match

Cute shoes mentioned in the title:

(From Target.  On sale for $5.  I know some of you are feeling my excitement!)

I knew JoAnn's had red fabric with white polka dots, because I had already bought some of it to make an apron (future post).  I pictured a full A-line skirt that was 100% comfortable.  This was my first attempt to make something that I would actually be wearing.  I did some research, but basically decided to wing it!  (No pattern.)
 
I measured around my waist and divided by two and used that as the length for the top of the skirt.  Then I used a yardstick to draw an angled line, beginning at the waist and ending at the length I decided on.  I folded the fabric in half and cut the front side and back side at the same time.

 
I added darts from the waist, down about 6 inches. 


I cut an opening for the zipper and sewed it into the skirt.   I hemmed the top and bottom edges and sewed the two side seams together. 


So fun to have a matching skirt to go with my new shoes!!

Monday, September 23, 2013

How to Make the Coziest Couch Blanket EVER!

It's a rainy fall day.  You've been busy all week and on Saturday, all you want to do is lay on the couch and watch a Harry Potter movie.  Or football.  Or take a nap.  There is one thing missing - you need a soft, cozy couch blanket.  Not just any couch blanket, the coziest couch blanket ever! 
 

Here is what makes this the best blanket around:

 
1. You can make it long enough to cover all of you
2. You can pick out fabrics that are soft and cuddly AND that match your living room
3.  The foot pouch
 
Here is what you need for this project:
 
2 yards of microfleece
2 1/2 yards of soft and fluffly found at JoAnn's Fabric
thread - matching both colors
sewing machine, pins, scissors, measuring, marking, etc.
 
 
I chose materials by feeling every choice in JoAnns!  This is aptly named - it IS soft and fluffy!
 
 
Cut your soft and fluffy material to two yards (the other 1/2 yard is for the foot pouch).
Then measure and cut 2 inches off of one long and one short side of the soft and fluffy.


You also need to cut the curled edge off of the microfleece.
 
 
Then it's time to work on the foot pouch.  It needs 2 inches cut off one of the short ends.  Then one of the long ends needs hemmed.  Fold 1/2 inch over and pin it well, then sew, using coordinating thread.
 
 
Then it's time to lay everything out and pin.  I had to move furniture around to get a large enough working space!  First, lay the microfleece, wrong side up and spread out any wrinkles.  On top of that, lay the soft and fluffy, right side up.  On top of that, lay the foot pouch soft and fluffy right side up.  Place the un-hemmed edge even with the bottom edge of the large piece of soft and fluffy.
 
 
Then fold the microfleece over the edge of the soft and fluffy approximately 1 inch and pin, all the way around.
 
 
Finally, sew the edges with a zig zag stich using the thread that coordinates with the microfleece.
 
 
It's hard to convey how perfect this blanket is - perfect size, amazingly soft and cozy - I have LOVED using mine and I've had hints from my family that this would make a great Christmas gift!
 
What would you watch while snuggled on the couch on a rainy day?

Monday, September 16, 2013

Thank You Picture→Thank You Notes

 As a photographer, I think photos are an amazing way to personalize anything.  I love personalized phone covers, notepads, thank you notes - anything.  I really like the idea of the bride and groom holding up a "thank you" banner to use for their thank you notes - but it takes planning! 
 
To make a banner for my sister Laura's wedding, I printed each letter.  Then I just folded the paper in half and glued the bottom together over ribbon.  I think I also had to glue the top to the ribbon, so the letters didn't slide around.
 

Their picture turned out beautiful!  They were taken by Absolute Expressions Photo, which is the photography studio I work for.  If you need a wedding photographer and you are in the Wichita area, you should DEFINITELY contact us!!

 
And I love the thank you notes!
 
 
What is your favorite personalized item?

Monday, September 9, 2013

Cookies...at a Wedding!?

My sister and her fiancé decided to forgo traditional wedding cake in favor of wedding cookies.  She enlisted family members to make a variety of cookies and to display those cookies I made a wedding cake display! 

 
For this project you'll need:
3 sizes of boxes
wrapping paper
wide ribbon
jewels strips with adhesive on the back
double sided tape
 
It was difficult to find boxes, because either the proportions didn't look right or I knew there wouldn't be any room for cookies. (Please excuse about the messy background!)
 
 
Then I just wrapped them like a present.  I used double sided tape to stick the ribbon to the bottom edge of each wrapped box and then added the jewel strips at the top of the ribbon.  I also decided to make two kinds of sugar cookies.
 
 
Here are the recipes I found online.  I don't bake that often, so I was really happy both turned out well!
 
(I used her basic sugar cookie recipe and her royal icing recipe)


These were a favorite of mine (and of Jordan's)!!  First of all, I love store-bought Lofthouse cookies.  Second, I found these pearl nonpareils and loved them - the color matched the wedding perfectly! 
 
 
Then I had the brilliant idea to use a small heart cookie cutter I had to add these in the shape of a heart.  The first picture best shows off the color, the second best shows off the heart shape.


A few notes on these:
1. All I have is a hand mixer and the dough broke my mixer.
2.  I finished making the frosting and felt it was a little bit bland and needed something else, so I added a bit of lemon extract.  Perfect addition!
 
This is how it turned out at the reception!
 

It doesn't hold a lot of cookies and it maybe looks a bit messy, but I love that it adds height and visual interest to the food table.


What are your favorite kind of cookies?

Monday, September 2, 2013

Baby Doll Blankets

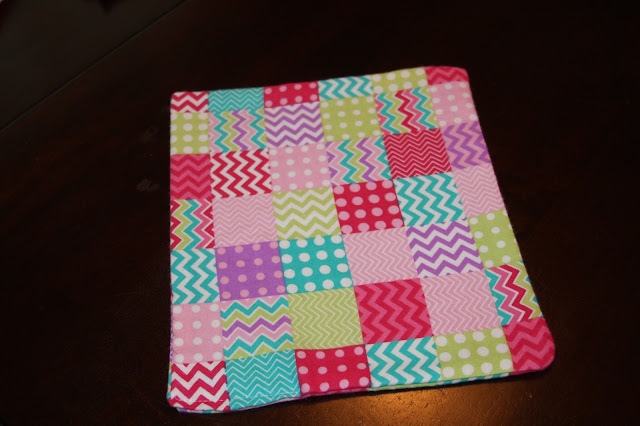
My adorable niece Hadley turned 18 months old recently and she is really into taking care of her dolls and stuffed animals right now.  She gives them rides on her little scooter and tells them goodbye and gives them a drink from her sippy cup occasionally.  I had some fleece leftover from my baby blanket projects, so I decided to make her some blankets for her dolls!
 
how to make small blankets for dolls

It was a great opportunity to experiment with different blanket-making methods I had read about. 
 
For the lavender fleece, I cut it about a half inch larger than the flannel and turned that half inch over and pinned it as the binding.  I hadn't yet tried mitered corners, so I tried that with this blanket.
 
 
This is how the corners look cut, but not yet sewed.
 
 
Finished blanket:
 
 
For the pink fleece, I made the flannel piece about an inch larger all the way around than the flannel. 
 
 
Then I folded in half, then folded in half again and pinned to make the binding.


Finished blanket:
 
 
Then I decided to take two flannel pieces and sew them right sides together, leaving about a 2 inch opening.


I cut the corners, so they lay better when I turn it right side out.
 
 
Then I turned it - I love this part - it's like a metamorphosis!
 
 
Then I used a skewer to poke the corners into place and then ironed the seams down.  Then I sewed the 2 inch opening.
 
 
Now I had three coordinating blankets and inspiration hit me to add a pillow!  I had white satin material and poly fill leftover from these ring bearer pillows I made, so I used that to make a doll pillow.


I loved how this project turned out and I hope Ariel, penguin and dolly enjoy them!
 

It was so precious to watch Hadley play with the blankets - she would give her baby it's pretend bottle then tuck her in!


Signature

Signature

You Might Also Like...

Blog Archive