Search This Blog

Showing posts with label craft for kids. Show all posts

Monday, August 14, 2023

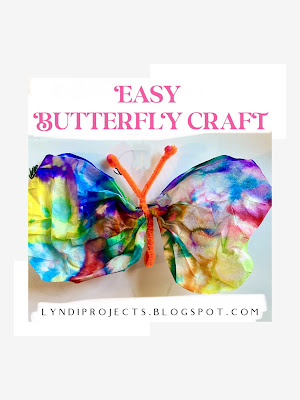
Easy Butterfly Craft


At this point in the summer, you may be running out of craft ideas - this is perfect for people who have standard craft supplies sitting around, but need a fun idea.  

For this project you'll need:
-washable markers
-coffee filters
-pipe cleaners
-spray water bottle
-pony beads (optional)
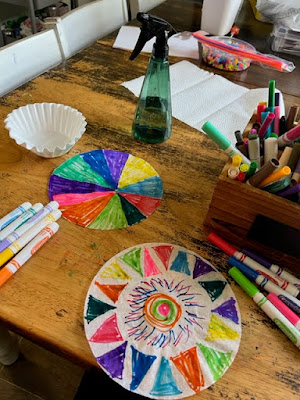


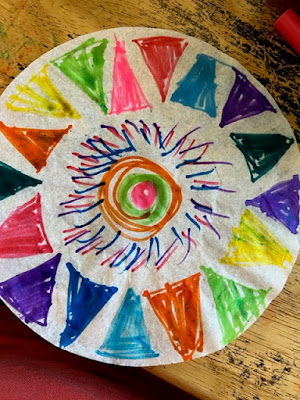
 Using washable (regular Crayola) markers, draw designs on 2 coffee filters.  I tried leaving white space and not leaving white space and both turned out great, so either works.
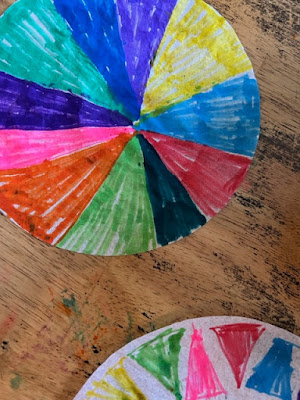


Then place them on top of a paper towel or plastic bag (to protect a surface below) and mist them with a water bottle.  It's fun to see the colors bleed and your design change.
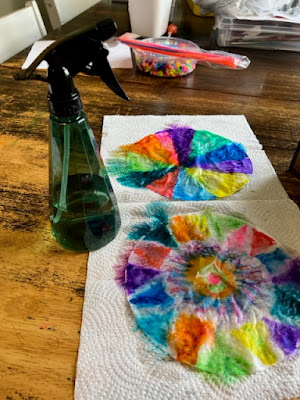
Then you let them dry.
Then accordion (or fan) fold each, in about 1/2 inch folds.
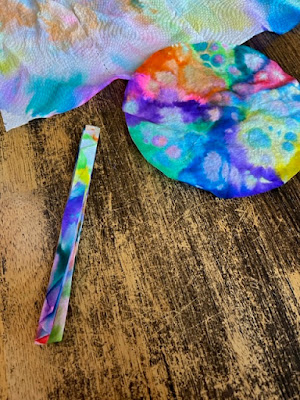


 Then unfold, stack the accordion folds on top of each other.  Then take a pipe cleaner, folded in half and twist to secure the coffee filters.  Leave straight pieces at the top for the antennae.  
Finally, add pony beads at the top and curl the pipe cleaner to secure them.

It goes perfectly with my other art projects on display!


Join Amazon Prime - Watch Thousands of Movies & TV Shows Anytime - Start Free Trial Now

Monday, October 5, 2020

Marbled Clay Bowls

This is a craft that I planned for my whole family (ages 2 - 62) and that everyone really enjoyed.  I read other blogs about making these and everyone said "they're addictive" and we found that to be true as well!  

Something else I love about these is that every one is unique and special.

  1. For This Project You'll Need:
  2. Polymer Clay - assortment of colors, larger size of white clay
  3. Knife
  4. Cutting board
  5. Rolling Pin
  6. Liquid Gilding
  7. Small Paint Brush
  8. Oven Safe Bowls
  9. Baking Sheet
  10. Oven


I gave everyone about 3/4 inch of white clay and then let them choose two other colors and gave them about a 1/4 inch of each of those colors.

Then we rolled each color separately into a "snake" about 5 inches long.  Then we twisted the snakes together several times.  Then fold that long piece in half and twist again.  Once you've done that, smush into a ball and then roll it into a flat disk shape, the thickness should be approx. 2-3 quarters stacked on top of each other.  


Then set the disk shape into your oven safe bowls and make it conform to the bowl shape, but the clay should not be pressed tightly to the bowl.  Then trim the top edge of the bowl, if you want.

Then bake, according to your directions on your clay.  Mine was 275 for 15 minutes.  

Once they started to cool, it was easier to get the bowls out and set on a cooling rack. 

The final step is to paint the liquid gilding around the top edge.  


Monday, December 30, 2019

DIY Snow Globe


I've wanted to try this project for a few years, so this was fun to try!

For this project you'll need:

A Jar - I wanted mine pretty small, without anything etched on the outside.  I ended up using a jar of mushrooms, because it was the size I wanted and I really liked the gold lid.  I think Salsa jars would be good options as well, if you use those, Step 1 would be to spray paint the outside of the lid.  I looked at Mason jars, but they have etchings on the outside.

Miniature figures - Miniature Assortment

Glitter - White Glitter on Amazon

E6000 Glue (I read about other people using hot glue and then the figures started floating.)

Glycerin (This link will take you to one at Amazon or I found mine at Walmart in the drugstore area.)

Distilled Water

One post I read said to use "fake snow" because it's bigger than glitter and easier to see, but I tried it and it looked terrible, it would clump together on the objects.

Step 1 - Gather your materials.

Step 2: Arrange your items on the inside of the jar lid and make sure the jar will still fit over them, then glue them down with the E6000 glue.  Follow glue instructions and let them dry overnight.


Step 3 - Fill the jar with distilled water.   I thought I needed to leave room for...water displacement from my figures, but I didn't.  I had to keep adding water.  So at this step, get the jar as full as possible.

Step 4 - Add about 5 drops of Glycerin (this helps suspend the glitter longer).


Step 5 - Add 1 - 2 TBSP of glitter, depending on how big your jar is.

Step 6 - Screw on the lid tightly.

Step 7 - Gently turn your jar over and then watch the snow fall!  (I say gently because I was shaking it like crazy and that didn't look as pretty.)


I think they make adorable Christmas gifts, they are fun crafts for kids to help make and can be used as decoration during winter seasons!


Signature

Signature

You Might Also Like...

Blog Archive