Search This Blog

Showing posts with label DIY wreath. Show all posts

Monday, August 15, 2016

Yarn Wrapped Burgundy Fall Wreath with Handcrafted Burlap and Lace Flowers

burlap and lace flowers, DIY flowers

I bought some burgundy yarn at Goodwill a few weeks ago with a vague idea of making a fall wreath. This weekend, the idea fully formed in my brain and I decided to get an assortment of lace and burlap and see what I could come up with.  It was really fun to just play around with the materials and see what I could create!

Here are the materials I started out with:


Then as I was watching a Veep marathon, I wrapped the yarn around the wreath form.  Other times I've done this, I just wrapped layers of yarn around, but this time I made sure to do a single layer, which took more time, but I like how smooth it looks.  This shows my progress in motion!


Then, using various methods as detailed in some of my previous blogs (Shabby Chic Fabric Rosette Toddler HeadbandFelt Flower WreathEasy Toddler Dress) I made flowers out of burlap and lace (and cheesecloth and tulle that I had in my craft supplies).


I love how it turned out!


Monday, June 6, 2016

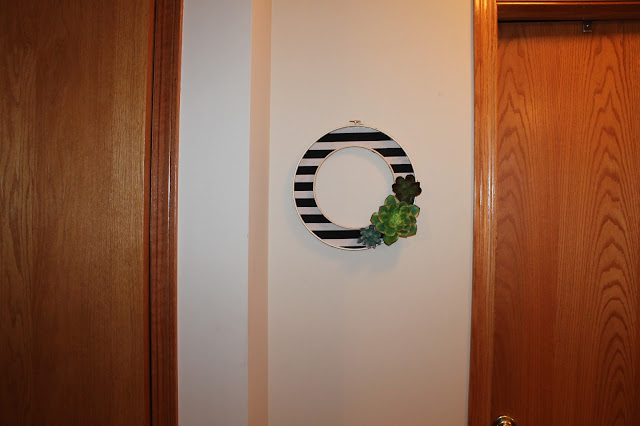
Modern Striped Succulent Wreath


Modern Striped Succulent Wreath, modern wreath, DIY wreath


Pretty Providence Wreath

While searching for a unique wreath to make on Pinterest - I found  this one and was obsessed with it - I used the Pretty Providence blog instructions to make my own and made my own adjustments in some places.

I got my materials from Hobby Lobby and bought two embroidery hoops, black and white striped fabric (I am using this as an outdoor wreath, so I really wanted to find laminated fabric.  Hobby Lobby had some, but I determined the stripes were too wide), a roll of cork and succulents.  The hoops I used were 4 inches apart and I think that looks about right.


This was way more difficult to make than I expected.  One problem - the cork is pretty thin and tears easily.  Another - the blog says to cut out the circle from cork and fabric and then hot glue the embroidery hoops on.  I tried this and even though I traced around the outside of the hoop, the cork ended up too small.  So I mod podged fabric first then hot glued the hoops on, then cut off the excess, which was really challenging.


With the hardened hot glue right at the edge, it was really difficult to cut the excess off.


Monday, January 5, 2015

Elegant Black Tulle Wreath

1. For full instructions on how to make a tulle wreath, see this previous blog post.
2. Apparently I didn't take a well-styled final picture. :(
 
 
I started with a large wire wreath form and wrapped it in black satin ribbon.
 
 
Then I cut lengths of black tulle and black glitter tulle by wrapping it around a book that I deemed the correct size and cutting both ends.
 
 
Then while watching a movie, I tied them on, alternating the regular and glitter tulle and pushing the tied pieces together occasionally.
 
 
Then I added embellishments.  I added a black feathered hair clip.  Then I hot glued on a the big round sparkly piece, which I found at Hobby Lobby.  Then I went shopping at an antique store to find the smaller brooch and pinned it on.  I experimented with adding peacock colored feathers, but decided to keep it simple, elegant black and bling.


Then at Christmas, the wreath went to a home with my sister Jordan!


Monday, December 9, 2013

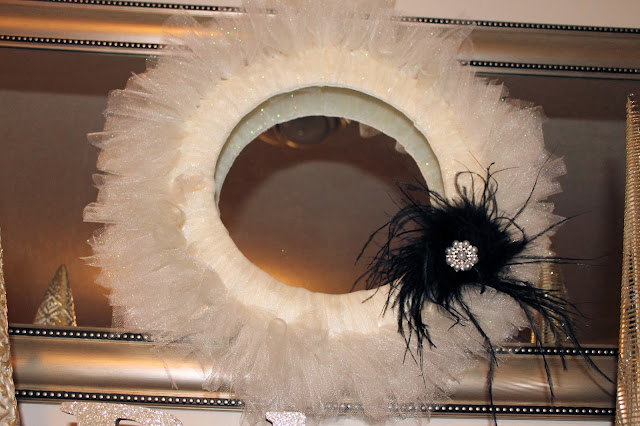
Tulle Wreath

black and cream tulle wreath, elegant wreath

For this Project you'll need:
wire wreath form
strips of coordinating fabric or ribbon
2 spools of tulle
feather hair clip
jewel for the center
scissors
hot glue gun/glue
 
Step 1:
Wrap the wire form with your fabric or ribbon.


 Step 2: 
Cut the tulle into 8.5-11 inch strips (depending on how full you want the wreath to look.  This one, I used about 9 in. strips) and tie them, all the way around the wreath, with the tie at the outer edge of the wreath. 


Step 3:
Add embellishments.  I clipped my feather to the tulle and hot glued a jewel in the center.
 
Step 4:
Hang and enjoy!


Signature

Signature

You Might Also Like...

Blog Archive